
Follow these simple steps to create a smooth and even surface: sand the wood with fine-grit sandpaper, clean it well, apply a primer designed for acrylic paint, sand again lightly, and repeat with a second coat of primer. Your finished product will look fantastic!

The information is not enough, maybe you need more information, wood prime is not that simple, and needs a complete guideline from zero to final. That’s why the post.
This article is the ultimate guide for priming wood for acrylic painting, including
- Why prime wood?
- how to choose the right wood for priming?
- How to apply primer properly step by step and more…
So are you ready? Let’s jump in!
Why Use Prime Wood for Acrylic Painting?
When wood is primed, it creates a surface that is absorbent, stable, and textured. This makes it perfect for acrylic paint adhesion, resulting in colors that are more vibrant and true to life.
Premier seats sit between the painted surface and the wood, preventing the absorption of paint that can result in dull colors and uneven application. You can check for more explain on Wikipedia.
While some artists may choose to skip using a primer and paint directly onto wood, it is generally not recommended. Without proper preparation, the paint is at a higher risk of flaking, discoloration, and unevenness – even for skilled artists.
Primer Or Sealer: What You Should Use Before Start?
| Primer | Sealer | |
| What is | A premier creates the foundation of painting. Add strong adhesion, smooth surface, powerful background color | A sealer acts as a shield for the wood, creating an impermeable barrier that shields against environmental factors and causing damage |
| Example | Gesso, Shellac based primer | Varnish, Wax and more |
| Apply time | Before paint | After paint and before primer |
How to Prime Wood for Acrylic Painting
Step 1: Choose the right type of wood
Consider using hardwoods such as birch, beech, or maple for a smooth and durable surface, which are also favored by many artists. Birch wood board is the most popular.
Softwood like pine or fil should be avoided because they have bad tendency to absorb moisture and can be prone to warping. And may need more prime layers to achieve desired finish.
You can find syntactic woods made of hardboard (MDF) that are inexpensive and good for painting. They have a unique texture and are less likely to warp than natural wood. While they can be used, it’s still recommended to use hardwood.
Here are some best wood board for acrylic paint
| Category | Grade | Note | |
| Arteza Wooden Canvas Board | Birch wood | Artistic | Best choice for acrylic paint, providing a sturdy and durable surface for artwork |
| U.S. Art Supply 18″ x 24″ Birch Wood Paint Boards | Birch wood | Artistic | The board are the top choice for acrylic paint pouring due to their high-quality wood and smooth surface. |
| Ampersand Art Supply Gesso Wood Painting Panel | Syntactic | Intermediate | Provides the perfect surface for acrylic paint to adhere and showcase its vibrant colors |
Step 2: Fill knots or imperfections
If your wooden surface has a lot of natural knots or imperfections, use a filler or putty to fill the gaps or holes. It will create a smoother and more even surface.
You also can be creative. use the knots to create a unique and interesting effect. Who knows, you will like it.
Step 3: Clean
It is important to clean the wood surface and free off all dust, dirt. Run a vacuum cleaner and then take a soft cloth, wipe the board.
Step 4: Sand
If you think your wood board surface is very smooth you can skip the important part.
Sending creates a smooth and even surface. For sanding, a new wood board take fine grit sandpaper but If the surface has been painted previously, take 120 grit sandpaper and rub the paint. Remove previous paint properly.
Those are the best sandpaper for the wood board
| Product | Grit | Note |
| 3M | Fine grit | Excellent option as fine grit |
| 3M | 120 grit | Do good job to remove old paint or harsh surface |
Step 6: Clean
Remove the sanded dust. Take a cloth and clean the wood properly.
Step 7: Apply Sealer (Minimum 2 Coats)
You can skip sealer part for hardwood, for example birch wood. Because it not has big issue like deep absorb upper layer paint.
Already mentioned, “sealer acts as a shield for the wood, creating an impermeable barrier”. So the wood can not able to absorb liquid or moisture over the sealer layer.
Applying sealer is ideal for softwood and syntactic (hardboard) wood.
Begin by applying a coat of sealant to all sides of the wood and allow it to dry completely until it is no longer sticky to the touch. If you notice any roughness on the surface you plan to work on, gently sand it with 220 grit sandpaper before wiping it clean.
Once the surface is smooth, apply a second coat of sealant.
Typically, two coats are sufficient to achieve a subtly glossy or satin finish on the wood. However, if you prefer a deeper, more intense seal, feel free to apply additional coats as desired. Allow the sealant to dry thoroughly between each coat.
Here are the best sealer for sealing wood
| Product | Grade | Note |
| Golden GAC-100 Gloss Acrylic Polymer | Artistic | Good Sealer |
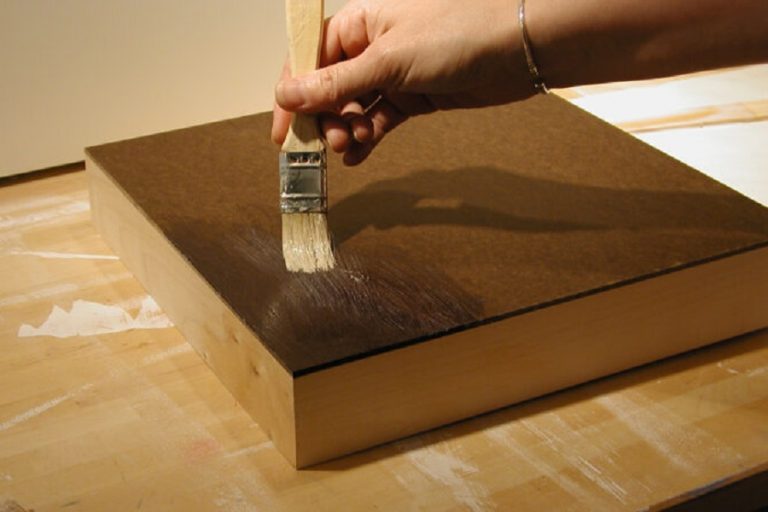
Step 8: Apply Primer with top technique (Gesso)
-Stir the gesso properly and ensure that it is mixed well. Because gesso tends to Seattle at the bottom of container
-Use a foam brush or paintbrush to apply a thin, even layer of gesso in long, smooth strokes from one end of the surface to the other.
Pro Tip: Apply a thin layer with a paint brush or roller. It is important to use a specific brush or roller that creates a smooth and even surface. Because any bamp or ridges in gesso can affect the final layer.
-Don’t apply too much pressure when applying brush, it can lead to clumps or brush marks.
-Allow the first coat of gesso to dry completely before adding more, which can take several hours depending on your workspace’s temperature and humidity.
-After allowing the surface to dry, gently sand away using a fine grit sandpaper any rough spots or bumps created by the brush strokes.
-Now apply a second coat following the same first coat method.
Here are some great gesso primer for wood panel
| Product | Features | Smooth finish |
| Liquitex Professional white Gesso Medium | Good adhesion, good coverage, flexible, water-resistant | Great |
| Golden artistic canvas primer white Gesso | Durable, good adhesion, water resistant | Great |
| Winsor & Newton Galeria White Gesso | Water resistant, durable, good adhesion | Great |
| Grumbacher Artist white Gesso | Flexible, water resistant, good adhesion | Great |
Different article I already explain about the gesso, You can check.
Pros
- Give excellent adhesion
- Prevent paint from peeling
- Make help to make smooth surface
- Can be also apply various of surface like canvas, paper even metal
- Can be applied for correcting wood painting mistakes.
- Increase sheen
Cons for applying gesso
- Can be difficult sand if applied as a very thick layer, result uneven surface.
Prime wood with gesso and acrylic paint looks like…
Step 9: Store
it’s important to store your primed wood properly to help preserve it for future use. Keep it in a cool, dry place that’s free from moisture and direct sunlight, and avoid stacking the panels too tightly to prevent warping or damage.
For long storage and search protection, you can package the primed wood panel in a right box.
Pro Tip: When storing wooden surfaces that have been primed and painted, it is important to store them flat to prevent warping or bending over time and also avoid exposing the surfaces to direct sunlight or extreme temperatures.
Helpful video…
In the bottom line, priming wood for acrylic painting is essential for achieving vibrant and true-to-life colors, and creating a stable and absorbent surface. By following these easy steps, including choosing the right wood, filling imperfections, cleaning, sanding, applying sealer and primer, and proper storage, you can create a smooth and even surface that will make your finished product look gorgeous.