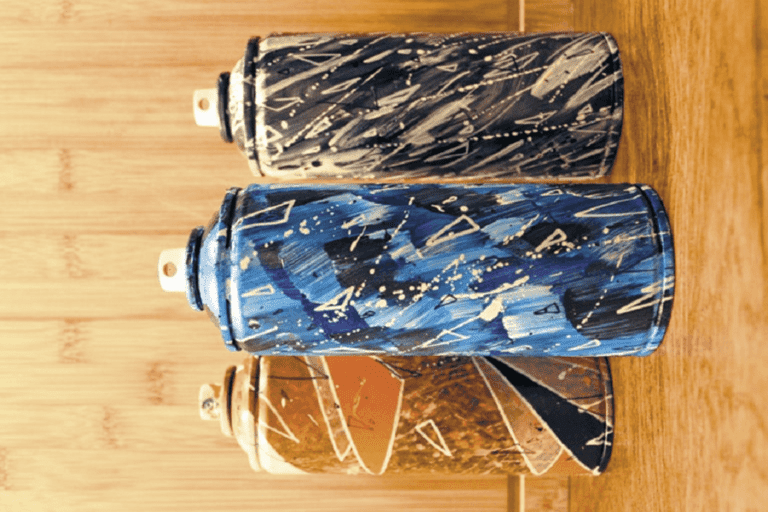

Tin is an ideal material for crafting durable and long-lasting objects that withstand outdoor conditions. With custom painting, tin offers endless design possibilities for unique gifts and home decor, including signs, ornaments, cans, containers and more.
There are a lot of options for painting tin as a craft project. But only two techniques will be discussed in this article – acrylic and spray – as they are the most popular options for painting tin in craft projects. Including,
- How to prepare
- Paint
- Seal and more trips and tricks.
Can You Paint Tin
Absolutely! To ensure a successful project, you’ll need to use a tin-compatible primer, high-quality paint, a reliable sealer, and the necessary tools.
That Plaidonline.com says: remove rust, wash, paint, seal tin.
Lets jump on step by step guide.
How to Paint Tin: Step by Step Guide
Preparation
Step 1: Choose a suitable workspace
Choose a clean and well ventilated area such as a garage or outdoor space or a prepared crafting indoor area.
Step 2: Choose right size of tin
Consider the size when selecting tin. Longer shapes may be better for storing supplies or decorations and small ones may be suitable for gifts or travel containers.
Step 3: Clean the tin
Clean any dirt, derbrit, oil. Wipe the surface with damp soapy cloth.
And sometimes, depending on the condition of the tin, advanced surface preparation is needed. For removing rust, stickers, adhesion resident or smoothing any dents or bumps need sanding the surface to ensure smooth finish.
Pro tip: If the tin is too rusty, use a rust remover before applying primer. It will help remove rust and prevent spreading.
Step 4: Protect the area
Before going to paint, cover all surrounding areas with a plastic sheet of drop cloth. It will protect your workspace from paint splatters and spills.
Step 5: Protect your hand
Painting is a messy project. Protect your hand from paint by wearing gloves or barrier cream.
Apply Spray Paint
Step 1: Choose Primer and Apply
If the tin surface is heavily rushed, you should use a primer. A primer prevents rust from forming and increases adhesion. Apply the primer as thin and even coat to avoid drips and runs. Hold primer 8-12 inches away and spray as sweeping motion.
Here are the top compatible paints and primers for tin.
| Rust-Oleum 249845 Painter’s Touch 2X Ultra Cover | Paint + Primer | Most popular among artists |
| Krylon K05150107 ColorMaster Paint + Primer | Paint + Primer | Best alternative |
| Montana Cans Montana GOLD Spray Paint | Paint | Good paint |
Step 2: Test spray paint
Before applying the entire tin, it is a good idea to test the paint in a small section. It gives you a good idea of paint color and coverage.
If you are new to painting tin do exercise on any cardboard. Then go for the final project.
Step 3: Apply paint
Shake spray can well then hold the can about 8-12 inches away and apply sweeping motion. Avoid applying paint to close or too far. Apply multiple layers, each coat dry then apply another layer.
You can apply spray from different angles or distances to create a unique texture or depth.
If you paint a large or complex surface, you can use a spray paint handle. It gives good control, a better grip and reduces finger fatigue.
Note: Before applying spray, always use a mask, gloves, and goggles for health safety.
Step 4: Apply finishing coat (optional)
Check any missing or uneven areas. Apply the finishing coats. It will make your painted surface more smooth and durable. You can also add a clear coat as sealer for more protection. But it is not needed all of the time because most of the spray paint works as sealer.
Step 5: Clean up
After completing the project, clean all tools fast. And don’t pour excess paint down the drain, it is harmful for the environment.
Apply Acrylic Paint
Step 1: Apply Primer
Before applying acrylic paint, you should prime the surface. So paint will adhere to the batter and will create a smooth surface. You should choose a suitable primer that is compatible with tin. You can use the mentioned spray primer for acrylic paint base coat. Application same as spray paint.
Step 2: Prepare paint
Properly prepare acrylic paint for optimal results. Mix thoroughly and thin with water if needed. Work quickly and keep covered to avoid drying out.
Step 3: Apply paint
Apply the paint in thin, even layers with a paintbrush or roller. Let each layer dry before the next coat, If possible sand lightly between coats for a smooth finish.
Apply a flat brush for long surfaces and for details painting use a details brush. Here is some good compatible paint for tin.
| Paint | Grade | Note |
| Golden Heavy Body Acrylic Introductory Set | Artistic | Superior pigment load and coverage, worth the investment. |
| Winsor & Newton Galeria Acrylic Paint | Artistic | Popular among artists, dries fast, easy to work with |
Step 4: Add the finishing touch
Once the paint is dry find missing and uneven paint areas and give extra touch there. You can make the finishing touch the next level, add a coat of glitter, attach decorative embellishments, and other interesting things as you like.
Step 5: Seal
Acrylic paint needs sealing for long-lasting. Use Rust-Oleum 249845 Painter’s Touch 2X Ultra Cover as a sealer. Apply as spray paint with thin and sweeping motion as mentioned before. Cover all the area. Between coats take 10-15 minutes to dry and after the final coat wait 1 hour.
Helpful video
Bottom line, That’s all! Time to go for practical.
I hope this article will be helpful for you.